How to Set Up a Guest Network for Your Router
A guest network is a separate network for visitors that allows them to access the internet without accessing your personal devices. In this article, we'll show you how to set up a guest network for your router in just 2 easy steps.
Why Set Up a Guest Network?
Setting up a guest network is a great way to provide internet access to visitors while keeping your main network secure. This is especially important if you have IoT devices or smart home gadgets that you don't want to be accessed by guests.
Step 1: Log In to Your Router
To set up a guest network, you'll need to log in to your router's web interface. The steps to do this will vary depending on your router model, but most routers have a default IP address of 192.168.0.1 or 192.168.1.1. You'll also need to know your router's username and password, which are usually printed on the label or found in the documentation.
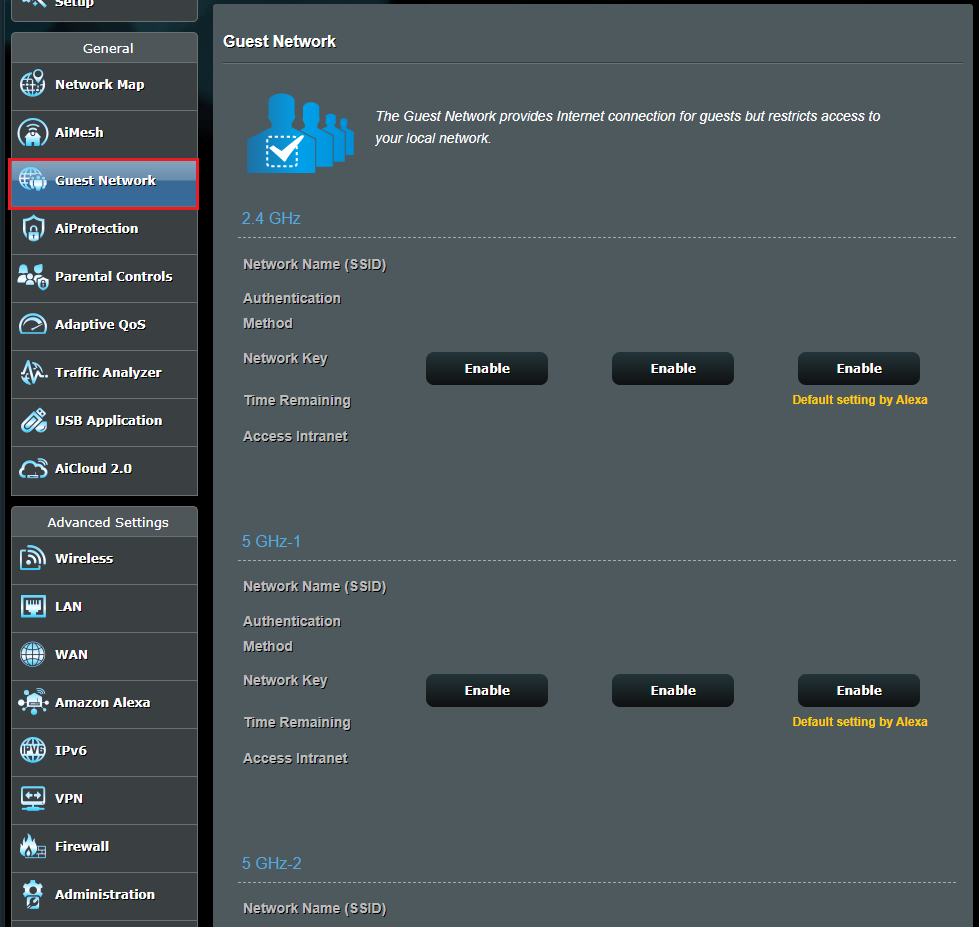
Once you've logged in, look for the guest network settings, which are usually found in the advanced or administration tab. You may need to click on a button or check a box to enable the guest network.

")


 | Vision ...")


")


