Comprehensive Beginner's Guide to Ceiling Fan Installation Instructions
Installing a ceiling fan is a great way to upgrade your home's look, improve air circulation, and lower your energy bill. However, the process can be intimidating, especially for those who are new to DIY projects. In this comprehensive guide, we will walk you through the step-by-step ceiling fan installation instructions, ensuring that you can complete the task safely and efficiently.
Before You Begin: Safety Precautions
- Turn Off the Power: Always shut off the power at the breaker before starting the installation process. Use a multimeter to double-check that the wires you'll be working on are de-energized.
- Read and Save These Instructions: Before beginning the installation of your new ceiling fan, read and follow the safety precautions provided in the manufacturer's installation guide.
- Use Proper Tools and Materials: Make sure you have all the necessary tools and materials listed in the manufacturer's instructions, including a screwdriver, wire cutters, and a ladder.
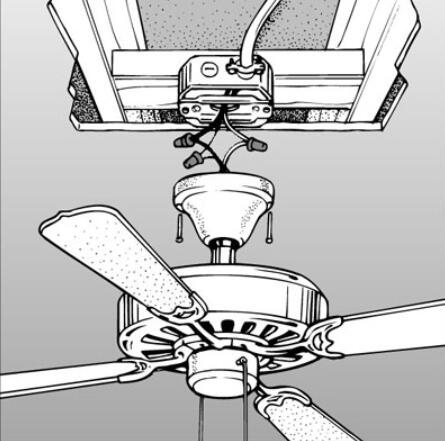
Step 1: Remove the Old Light Fixture
Start by turning off the power and removing any glass shades or light bulbs from the old fixture. Use a screwdriver to release the mounting bracket and gently pull the fixture away from the ceiling.


 | Family Handyman")


