Drywall Finishing Techniques for DIY: A Step-by-Step Guide
Finishing drywall is a crucial process that transforms raw gypsum board into a seamless and visually appealing surface. Whether you're a DIY enthusiast or a professional contractor, understanding the essential steps involved in drywall finishing is essential to achieve a smooth and professional result.
Tools and Materials Needed
- Taping knife
- Sanding block
- Joint compound
- Painter's tape
- Primer and paint
- Putty knife
- Mud pan
Preparation is Key
Before you start finishing your drywall, make sure your walls and ceiling are free of dust, dirt, and any other debris. This will ensure a smooth finish and prevent any imperfections.
Step 1: Apply Joint Compound
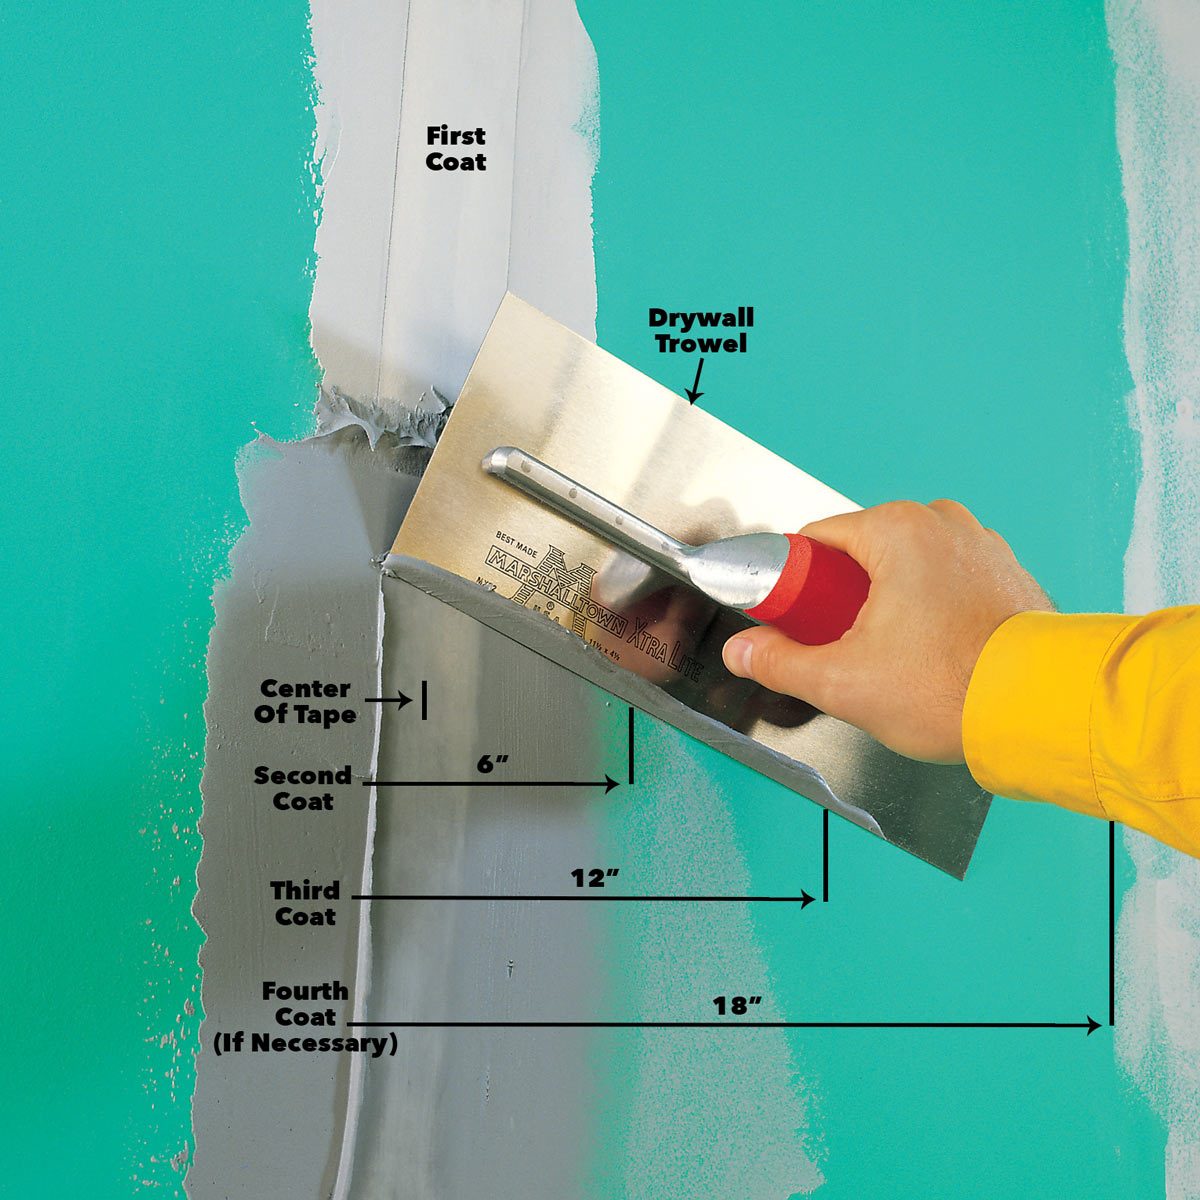
Apply a thin layer of joint compound to the seams and joints using a putty knife. Hold the knife at a 45-degree angle and press it firmly onto the drywall. Wipe off any excess compound with a damp cloth.
Step 2: Apply Second Coat of Compound
Allow the first coat of compound to dry completely before applying a second coat. Use a putty knife to apply another thin layer of compound, feathering it out towards the edges.
Step 3: Sand the Surface
Use a sanding block to smooth out any imperfections and create a seamless surface. Sand in a circular motion, working from the center of the seam outwards.


+over+drywall+seams.+The+contractor+is+careful-1920w.webp "Hanging and Finishing Drywall | Complete DIY & Pro Guide for Smooth Walls")


