Netgear G Router Setup for Large Network: A Comprehensive Guide
Setting up a Netgear G router for a large network can be a daunting task, especially for those who are not familiar with network configurations. However, with the right guidance, you can ensure a seamless and secure connection for all your devices. In this article, we will walk you through the steps to set up a Netgear G router for a large network, covering everything from unboxing to advanced features.
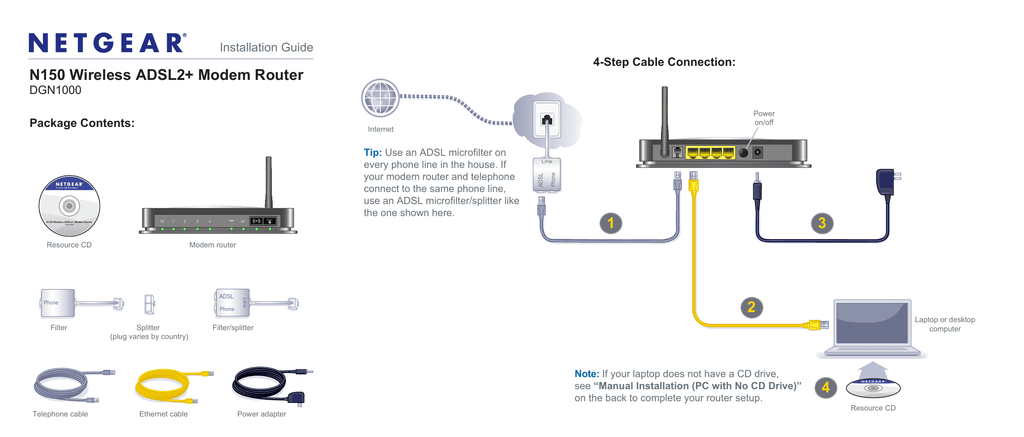
Unboxing and Physical Setup
Begin by carefully unboxing your Netgear G router and removing all the accessories, including the power cord, Ethernet cables, and antennas. Next, locate a suitable place to install the router, ideally in a central location to ensure maximum coverage. Use the provided screws to secure the router to a wall or a cabinet, and plug in the power cord to power on the device.
Accessing the Admin Setup Page
Once the router is powered on, use a computer or mobile device to access the admin setup page. Open a web browser and type the default IP address of the router (usually 192.168.0.1 or 192.168.1.1) to access the login page. Enter the default admin username and password (usually "admin" for both) to gain access to the router's settings.


 On Amazon")


